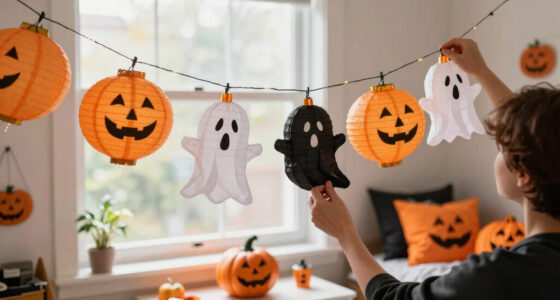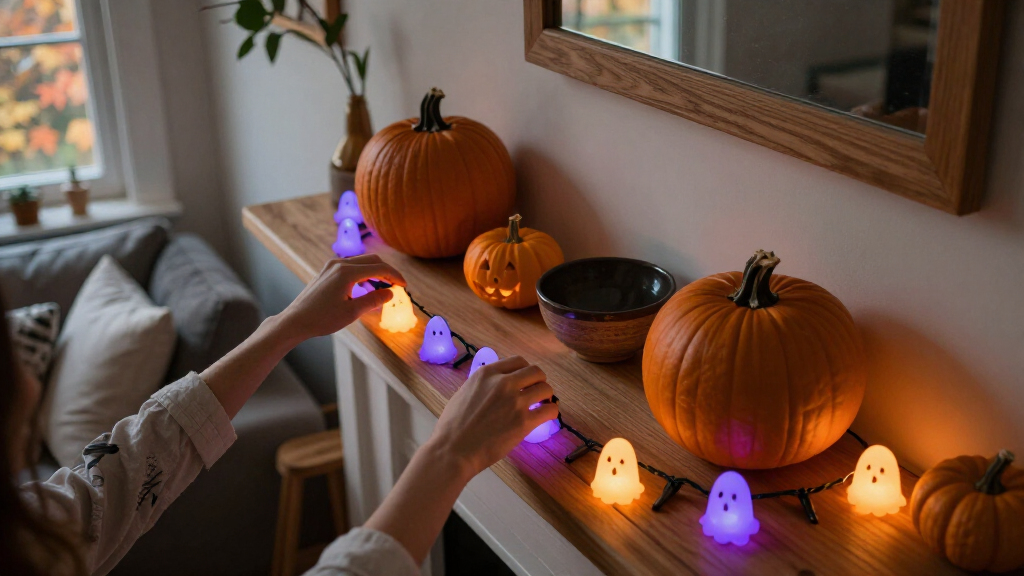

Use this guide to plan and hang Halloween decorative string lights indoors or outdoors, then check that the display works safely. It is written for beginners who can reach the installation area without climbing onto an unstable surface. Allow 30-60 minutes, depending on the length of the string and the number of attachment points.

Get decor and gifts delivered free — and shop member deals
- Fast, free delivery on millions of items
- Access to Prime Big Deal Days deals on October 6–7
- Prime Video, Amazon Music and more included

20 ft 40-LED Halloween String Lights with Pumpkin, Bat, Spider, and Ghost Shapes
- ✔ Length: 20 feet
- ✔ LED count: 40
- ✔ Shapes: Pumpkin, bat, spider and ghost

Mosoan Halloween String Lights, 20 ft, 30 LED Pumpkins, Ghosts, and Bats
- ✔ Length: 20 feet
- ✔ LED count: 30
- ✔ Designs: Pumpkins, ghosts and bats
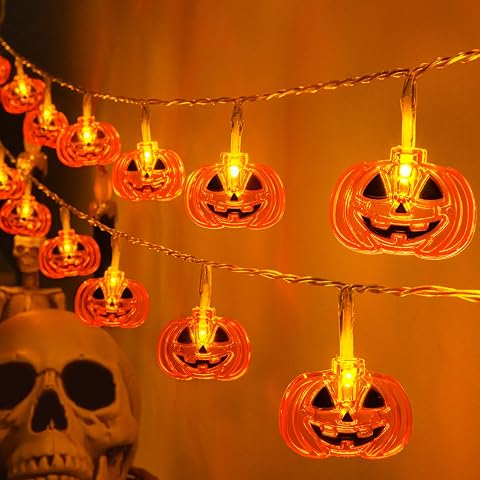
FFZZKJ Halloween Pumpkin String Lights, 10 ft, 20 LEDs
- ✔ Length: 10 feet
- ✔ LED count: 20
- ✔ Design: Pumpkins
Difficulty: Beginner | Time: 30-60 minutes
What You’ll Need
Tools & Materials:
- Halloween string lights and their product instructions
- Tape measure
- Outdoor-rated clips or hooks for exterior use, or removable indoor clips
- A stable step stool or ladder if needed
- Extension cord rated for the location, only if required
Knowledge:
- Basic ability to plug in and inspect electrical decorations
- Ability to use a step stool or ladder safely, if the lights need to be mounted above reach
Check the light string and packaging before installation. For outdoor displays, use lights, plugs, clips, and extension cords rated for outdoor use. Follow the manufacturer’s limits for connecting strings and using an extension cord. Do not use damaged lights or place electrical connections where rain or standing water can reach them.
20 ft 40-LED Halloween String Lights with Pumpkin, Bat, Spider, and Ghost Shapes
For shoppers who want their lights to carry the Halloween theme without relying on a separate decoration, Huyamap’s 20-foot strand offers the broadest mix in this group. Its 40 LEDs use pumpkin, bat, spider and ghost shapes, and the listed orange, purple, green and white colors add more visual variation than either the warm-white-only FFZZKJ strand or Mosoan’s listing, which does not specify multiple colors. That combination makes Huyamap the strongest fit for a display meant to look playful and unmistakably seasonal.The extra options come with a practical consideration: this is a battery-powered set that requires three AA batteries, sold separately. That supports flexible placement where outlets are inconvenient, but you will need to provide power and keep the battery box accessible. Its remote-controlled six-hour-on/18-hour-off timer and eight modes make it easier to manage than a basic strand, while IP65 protection is listed for indoor and outdoor use. Compared with Mosoan’s 30 LEDs over the same stated length, Huyamap puts more lights into its run; choose it for maximum motif and color variety, and skip it if you want an understated, single-color pumpkin accent.
Pros:
- Four Halloween shapes: pumpkins, bats, spiders and ghosts
- 40 LEDs across a 20-foot strand
- Eight modes and a remote-controlled 6-hour-on/18-hour-off timer
- IP65 rating and sealed battery box for indoor or outdoor decorating
Cons:
- Requires three AA batteries, which are not included
- More colors and motifs may feel busy in a coordinated or minimalist display
Best for: Decorators who want a long, multicolor strand with several recognizable Halloween motifs for a prominent indoor or outdoor display.
Not ideal for: Buyers who prefer a restrained warm-white look, want to avoid supplying batteries, or only need a short accent strand.
Bottom line: We’d pick Huyamap when coverage, shape variety and multicolor lighting matter more than a simple, subdued accent.
“We’d pick Huyamap when coverage, shape variety and multicolor lighting matter more than a simple, subdued accent.”
Mosoan Halloween String Lights, 20 ft, 30 LED Pumpkins, Ghosts, and Bats
Mosoan is the straightforward alternative for anyone who wants 20 feet of mixed Halloween shapes without choosing Huyamap’s 40-LED, four-color presentation. Its 30 LEDs feature pumpkins, ghosts and bats, giving a display a clear seasonal theme while keeping the stated design lineup narrower. That makes it a useful middle ground: more varied than FFZZKJ’s pumpkin-only strand, yet less feature-rich on paper than Huyamap’s shape and color mix.It shares the useful basics—eight lighting modes, a six-hour-on/18-hour-off timer and an IP65 rating for indoor or outdoor use. The key tradeoff is that three AA batteries are required and not included, so placement freedom depends on having batteries ready. At the same listed 20-foot length as Huyamap but with 30 rather than 40 LEDs, it may suit buyers who prioritize a mixed motif across a long run over a denser set of lights. The supplied details do not state light colors or remote control, so we would not choose it when those are deciding features.
Pros:
- 20-foot length with three familiar Halloween motifs
- Eight lighting modes
- Automatic 6-hour-on/18-hour-off timer
- IP65 water resistance and flexible battery-powered placement
Cons:
- Three AA batteries are required and not included
- 30 LEDs, fewer than Huyamap’s 40 across the same stated length
- The supplied details do not specify light colors or remote control
Best for: Shoppers decorating a longer railing, mantel or room edge who want pumpkins, ghosts and bats in one battery-powered strand.
Not ideal for: Anyone seeking a specified multicolor effect, a remote control, or the highest listed LED count in a 20-foot set.
Bottom line: Mosoan makes sense when we want a long strand with mixed Halloween shapes and can do without the more elaborate details listed for Huyamap.
“Mosoan makes sense when we want a long strand with mixed Halloween shapes and can do without the more elaborate details listed for Huyamap.”
FFZZKJ Halloween Pumpkin String Lights, 10 ft, 20 LEDs
FFZZKJ takes a more restrained approach than the two 20-foot sets: 20 warm-white pumpkin LEDs across 10 feet. That shorter run is easier to fit around a small window, shelf or tabletop display, and the consistent pumpkin shape gives it a tidier look than a strand mixing several motifs. It is the clearest choice here when the decorating area is limited or when warm-white light better suits the rest of the room.That focus also limits its reach. At half the listed length of Huyamap and Mosoan, it will not cover a long railing or wide doorway as readily, and the warm-white color may not create the dramatic multicolor effect some Halloween displays call for. It still offers eight modes, a six-hour-on/18-hour-off timer and IP65 protection, so it retains the operating features shared by the longer options. The description says battery powered but does not state a battery count; check the product details before setting up, and factor in battery access when choosing a location. Pick FFZZKJ for a compact pumpkin accent, not broad coverage or shape variety.
Pros:
- Compact 10-foot run with 20 pumpkin LEDs
- Warm-white color for a coordinated, less colorful display
- Eight lighting modes and an automatic timer
- IP65 protection is listed for the lights, wire and battery case
Cons:
- Half the length of the Huyamap and Mosoan strands
- Pumpkin-only design and warm-white light limit visual variety
- The supplied details do not specify the required batteries
Best for: Decorators who need a shorter strand for a small display and prefer warm-white pumpkin lights over multiple shapes or colors.
Not ideal for: Buyers covering a long outdoor railing, seeking ghosts and bats, or wanting a clearly specified multicolor light set.
Bottom line: We’d choose FFZZKJ for a small, warm-white pumpkin accent, while Huyamap or Mosoan is a better match when the display needs longer coverage.
“We’d choose FFZZKJ for a small, warm-white pumpkin accent, while Huyamap or Mosoan is a better match when the display needs longer coverage.”
As an Amazon Associate we earn from qualifying purchases.
Before You Start
Choose a route that keeps lights away from walkways, doors that can pinch the wire, hot bulbs, fireplaces, and other heat sources. Plan to plug the display into an outlet that is suitable for the location; outdoor connections need protection that follows the product instructions and local electrical rules. Do not overload an outlet or connect more light strings than the manufacturer permits. If the weather is wet or windy, wait until conditions are dry and calm before installing exterior lights.
Step-by-Step Instructions
Step 1: Choose the display area
Pick the surfaces you want to outline, such as a window, porch railing, mantel, or doorway. Decide where the display will start and end, and locate the nearest appropriate outlet. Keep the planned route clear of walking paths and places where a door or window could catch the wire.
Tip:For a simple, tidy display, outline one or two features rather than stretching a short string across a large area.
Check: You have a clear route from the starting point to the outlet, with no planned section crossing a doorway or walkway.
Step 2: Measure the route
Measure the full path the lights will follow, including turns and the distance to the outlet. Compare that measurement with the usable lighted length on the package. Leave enough slack for gentle curves and connection points; do not pull the wire tight to make a short string fit.
Tip:Check whether the package lists the lighted length separately from the lead wire between the plug and first bulb.
Check: The string can reach the full route and the outlet without tension, unsafe connections, or an extension cord placed across a walkway.
Step 3: Inspect the lights and attachments
Unplug the lights, then lay them out and check the wire, plug, bulbs, and any connectors. Replace missing bulbs only with the type specified by the manufacturer. Set aside any string with cracked insulation, exposed wire, a loose plug, corrosion, or signs of overheating. Match the clips or hooks to the mounting surface and location.
Tip:Use outdoor-rated clips outside. Avoid staples, nails, and sharp fasteners that can pierce or crush the wire.
Check: The string has no visible damage, and you have enough suitable clips or hooks to support the planned route.
Step 4: Test the string before hanging
Place the lights on a dry surface and plug them in according to the instructions. Confirm that the bulbs illuminate as expected, then unplug the string before mounting it. If the lights do not work, follow the troubleshooting section before continuing.
Tip:Testing first makes it easier to spot a faulty string without having to remove it from the display.
Check: The string lights as intended during the test, and you have unplugged it before installation.
Step 5: Attach clips along the route
Mark or estimate clip positions along the route, placing support points at corners and wherever the wire could sag. Install clips according to their instructions and the surface material. Use only removable indoor clips on suitable interior surfaces; use exterior clips made for the outdoor surface outside.
Tip:Place supports close enough to hold the wire evenly, but do not force a clip closed around a thick connector or bulb.
Check: The clips are secure, spaced along the route, and positioned so the wire can rest in them without being squeezed.
Step 6: Hang the lights
With the string unplugged, begin at the end nearest your starting point and place the wire gently into each clip. Keep the bulbs facing the direction you want, and leave a small amount of slack at corners. Keep the plug and any connectors accessible rather than wedged behind trim or furniture.
Tip:If using a ladder, set it on a firm, level surface and move it as needed instead of leaning far to one side.
Check: The lights follow the planned outline, the wire is supported, and no section is stretched, pinched, or hanging where someone could snag it.
Step 7: Connect and power the display
Check that all connections are fully seated and placed as directed by the manufacturer. If an extension cord is necessary, use one with the required rating and length, route it away from foot traffic, and keep outdoor connections protected as specified. Plug the display into the outlet only after installation is complete.
Tip:Do not exceed the maker’s maximum number of connected strings or extension cord instructions.
Check: The plug reaches the outlet without strain, connections are secure and dry, and the cord does not create a trip hazard.
Step 8: Check the finished display
Turn on the lights and view the display from the usual approach, such as the sidewalk or living room entrance. Look for dark sections, sagging wire, glare, or bulbs obstructed by trim. Switch off and unplug the string before adjusting clips or moving a connection.
Tip:Use a timer only if it is rated for the string and the installation location.
Check: The lights illuminate evenly, stay in place, and can be switched off without moving furniture or stepping over a cord.
Common Mistakes to Avoid
- Using indoor-only lights or extension cords outside. — Check the labels and instructions for outdoor use before placing any part of the setup outdoors.
- Pulling the wire tight or supporting it with staples. — Measure with slack for turns, use clips made for the surface, and never pierce or crush the wire.
- Connecting too many strings or extension cords. — Follow the manufacturer’s connection limits and use a suitable outlet and cord.
- Leaving plugs or connectors exposed to rain or standing water. — Place and protect connections as directed by the product instructions, and unplug the display if water reaches them.
Troubleshooting
Problem: The string does not light during the initial test.
Solution: Unplug it, check that the outlet works with another suitable device, then inspect the plug, connectors, and bulbs. Reseat connections or replace a bulb only as the instructions allow. Do not use the string if the wire or plug is damaged.
Problem: Only part of the string lights.
Solution: Unplug the string before checking for loose bulbs or connectors. Replace a bulb only with the specified type. If the dark section remains, stop using the string and check the maker’s repair guidance.
Problem: The lights sag or clips come loose.
Solution: Unplug the display, remove strain from the wire, and add or reposition suitable clips. Check that the surface is clean and dry and that the clips are rated for that surface and location.
Problem: The plug or connection gets wet outdoors.
Solution: Switch off power at a dry, safe location if possible, and do not touch a wet plug or connection. Keep the display off until the area is dry and the setup can be inspected; replace damaged parts before reuse.
What Success Looks Like
The display follows the planned route, stays supported without pinched or taut wire, and lights evenly when switched on. Plugs and connections suit the location, remain accessible, and are protected as the manufacturer directs. No cord crosses a walking path, and the lights can be switched off safely.
Next Steps
Switch the lights off when they are not in use, and unplug them before cleaning, adjusting, or removing them. At the end of the season, take them down carefully, check for wear, and store them dry without tight bends or tangles. Discard or recycle damaged strings according to local guidance.
Frequently Asked Questions
Can I use Halloween string lights outdoors?
Use them outdoors only when the lights and every cord or accessory exposed to the weather are rated for outdoor use. Follow the instructions for connection protection and placement.
How many light strings can I connect together?
Check the limit printed on the packaging or in the product instructions. The allowed number varies by product, so do not assume strings with similar bulbs have the same limit.
Can I cut a string of decorative lights to fit?
Do not cut it unless the manufacturer explicitly says the model is designed to be cut and provides the procedure. Cutting a standard string can expose live wiring or make it unsafe.
What is the safest way to hang lights on a window?
Use clips or hooks designed for the window surface, keep the wire clear of moving sashes, and avoid blocking an exit. Do not close a window on the cord.
Fall Picks
fall essentials
As an affiliate, we earn on qualifying purchases.